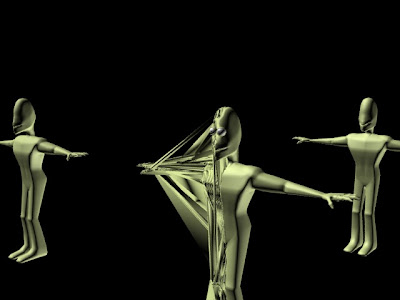
Everything was going as planned, I finished one of my morph targets off and tested it this is what happened:

Not cool! To say the least, because only one half of it's body was affected I assumed from the beginning that it had something to do with the symmetry modifier.
How to over come this?
I continued to test the limits I could go to before the distortion of the mesh happened again but it would have been pointless to continue with this model as the limits I could go to were extremely limited, it was happening mostly whenever I moved the vertices around where they would link with the projected half of the model (I didnt move them outwards of course, just upwards or downwards to narrow the mouth or open the mouth as this would mess up the symmetry alignment).
I tried to collapse the models modifiers and create an editable mesh with which then I could add my morpher. This was a waste of time and a setback because
1) I would have had to have re-cloned all morph targets as editable meshes.
2) Even if I did re-clone all the meshes it would have taken a hell of a long time to create the facial features considering I had a hell of a lot more vertices to deal with because I couldn't toggle the editable poly modifier to go and tweak the low poly model to see how it comes out with turbosmooth switched on.
I had to re-think the situation, I tried to overcome this by creating what I called the "Morph Factory". To try and explain it simply, because it can get a bit wordy I created another save file from which I could make morph targets which were not collapsed, because in the factory the "Queen" wasn't collapsed, so I could clone from her morph targets, adjust them how I wanted them and then I cloned that morph target and then I would save the file then open my main file. From my main file of collapsed models I then went to File-Merge, picked the named model I wished to use as the models morph target and bring it into the scene and SUCCESS!! It worked.... But.. I ended up finding out a much easier solution which was more time efficient and was an extremely simple solution.
Final Solution
I went back to my save file from where Morph factory came from with the un-collapsed models and removed the symmetry modifier, as a test I then made a morph target and added a morpher to my main model, this worked fine as usual, so then I added a symmetry modifier on top of the morpher and tested the morpher out and SUCCESS!!!
It bloody worked and I was so relieved, such a simple solution and I went so far out of my way to try something complicated, so my end modifier list was:
symmetry
morpher
turbosmooth
editable poly
Although what is strange, is originally I tried to add a morpher and place it this way round, but the distortion thing still happened but I didnt try to delete the symmetry modifier originally, which is why I ended up going the long way round.
So one thing I have found out is, if you are getting this problem, delete symmetry and morpher if you have it in your modifier list put in morpher first then on top of morpher add the symmetry modifier.
But what you need to do is ensure that all you have in your modifier list is editable poly with (optional but this is what I had) turbosmooth, then copy your model as normal and create the morph target, you can add a symmetry modifier to your morph target to make it easier to see how the model looks, but once you have edited it delete the symmetry modifier and continue that process. Once you have all your morph targets (make sure none of them have symmetry modifiers, all of them should only have turbosmooth and editable poly)with your main model who will be animated, add the morpher modifier, add objects as normal (I think you can add them in later but I didnt risk it) then once you have done that then add the symmetry modifier.
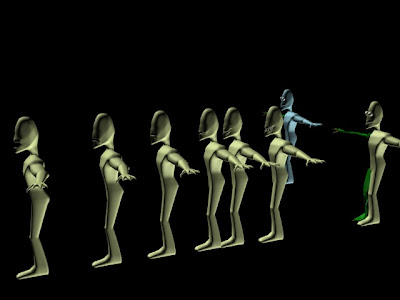
The following is a render of the scene to show you how my scene looked before I added a morpher and symmetry modifier to my main characters:

NOTE All models do not have the symmetry modifier put on them until the very last point when all morpher targets are complete even after the morpher target has been added to the morpher list for the animated characters, they still do not have a symmetry modifier attached, only the characters who will be animated do.
Animations
The following animations have been experimentations with some of the final morpher target faces.
This one is a scared/shock/horrified sort of face:
SHOCK HORROR!
This was a trial test to see blinking with a facial feature and how often blinking should be animated in the final animation:
Blink and Smile :D
This video was testing out one of the grins these characters have with a sly sort of look:
Grin and bear it!
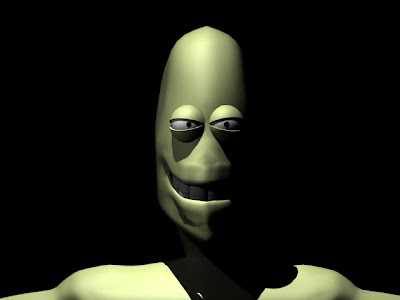
This test video is my current favourite, it's basically a slight alteration from the sly grin one above but looking pretty evil. With this one I fooled about with lighting to create a menacing atmosphere.

I used an omni light and placed it above the character to cast the shadows down his face and I placed a spotlight to the right side of his face to illuminate particular features of his face, mainly to illuminate his teeth because they weren't being fully exposed, it also adds to the madness!!!
Sinister Grin
For the final test video, I wanted to see if it would be possible to animate my characters mouth to be articulate enough for full speech. I used the "Jolly Tosh Old Chap" sound clip to try this and it came out with an interesting result and not as bad as I was expecting.
Although I would love to take it further and create full speech within this animation I think it would be too time consuming, I will animate them with facial features and voices but more with grunts and groans, although for my personal projects I will take this further and more than likely use these characters also:
Lip Sync test
I know, he's blinking far too much!! This is something I have noted for my animation, how frequent the blinks should occur and for what facial emotions I personally think blinking should occur more often for (but I am still happy with the frame rate of the blinks).
From experimenting with my characters with different facial poses and aspects on how to overcome the animation i have learned the strengths, weaknesses and limitations of my "Actors" and what the best way to use them is to get the most out of them for my animation. These experiments in my opinion have been extremely productive and beneficial into delving deeper into understanding 3DS MAX and how to overcome these obstacles in future projects, which I will be doing plenty of!!

No comments:
Post a Comment