Overall, I am pretty happy with the outcome of my assignment, unfortunately though due to time restraints I did have to minimise the animation's duration, the character was supposed to trick the other character twice not just once like in the Fable, but the way i wanted to do this was too costly in time and rendering, I will have to do an extended version!!
Speaking of time constraints, because of this I did have to create a completely new story in comparison to the original story for the boy who cried wolf (with the characters working in a cake factory). Unfortinately though, I did not create a storyboard for this workflow, this story and the animations were off the cuff, the only thing I took off the original storyboard was the characters visually and the way the antagonist (Barry) would behave, other than that everything is completely improvised as i went along animating which I really enjoyed as it puts you in a position where you can't go back on yourself and you have to solve issues in that moment of time which I really enjoy doing rather than spending a large portion of time planning and plotting, I think its useful to do this, but not to follow it 100%. Only take what you want from the plans and completely transform the original into something completely new, I find this method more rewarding in a lot of respects. The original storyboard can be found after this evaluation
This module has been a great learning curve, from setting up characters for an animation, the biped set up and editing of the envelopes. The animation aspect wasn't as much as a learning curve as the preparation of the characters in MAX, as Ive had experience with 3d animation before, it was more the fact of figuring out a way to overcome technical issues within the animation and the editing, which was also good fun, figuring out and using which parts of what footage in order to iron out the flaws which can be seen in a lot of the areas of the raw footage!!
If i was to do this again, i probably wouldn't change much other than perhaps try just a different fable using these characters, the lion and the mouse fable in an abstract way would have been interesting, if done reservoir dogs style, but of course the brief states childrens show, so maybe this could be a personal project!! I enjoyed creating and working with these characters for their simplicities and complexities and I really want to master full biped movement to add to my portfolio including expression, there is a lot to reflect on from this piece of work and for me personally to analyse, scrutinise, improve and re implement into my future pieces of work.
Overall I'm pretty happy with what I have done, I think for next time I will be a bit more on form in terms of maintaining a consistent workflow to ensure I can get the maximum amount of work out, but other than that I'm happy with the end result.
Friday, 14 May 2010
Animation issues with walking!!!
When doing the animation for the first scene, I experienced some serious issues when it came to the character walking towards the electric fence, for some reason I could not get him to move across the scene.
For this I just cheated a little bit and grouped the entire scene together and moved the scene towards the character, creating the illusion that the character is in fact moving and not the scene. Also the characters walk cycle screws up towards the end, so i rendered three different camera viewpoints in order to edit between all the shots to hide the screw up of his walk.
Apart from this slight issue I had to overcome, as far as animation is concerned I have had no other issues which have obstructed me from achieving what i want out of the characters and scenery likewise.
Thursday, 13 May 2010
Setting up the scene


Because I am relying on the animation and the content of whats going on through the animation I have always made it clear to myself that I will keep the stage simple.
Electric Fence

Being the main prop in the animation, it was relatively if not very easy to make, quite simply I built one large rectangular shaped box, from that copied, rotated and resized that box to make one of the fence posts then copied that fence post and spread them out evenly. I then found a concrete texture online and applied it to the base and posts, nothing fancy just stuck it straight on.
For the "wires" I applied exactly the same technique only using a cylinder shape.
Danger Sign

To make this I made a plane, resized the way I wanted then placed it on the fence.
I went online and google imaged "Electricity sign" or something along those lines.
Using the material editor I imported the image and adjusted and tweaked accordingly. If I remember rightly, I simply removed the tiling options off and then using the horizontal and vertical alignment along with rotation and length and width size, positioned the texture in place, this out of the whole fence building was the most time consuming aspect!
Switchbox

The switch box is a box model which I converted into an editable poly. Using quickslice I made two more edges horizontally, which allowed me to bevel and extrude inwards the resulting polygon. I then made and resized a cylinder and sphere and placed them inside the box.
Because I really couldnt be bothered with trying to apply two different textures onto one model for the on/off labels, I modelled them, the o from a cylinder with the cap bevelled and extruded inwards, the F from a box rescaled, with using the quickslice and extrude I could create the F shape and for the N I simply juat used extrue on a rectangular box shape and then cloned the additional O and F, I then changed the colour to black. I really want to add a dirty sort of bump map to the box, but maybe that will have to be something to experiment on for the next time!
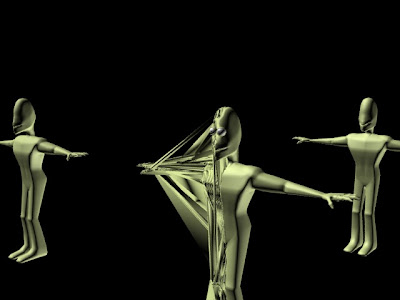
Painting the weights

Painting the weights during the skinning process was not too much of a chore, 3ds MAX already pretty much set up the skin how I wanted it except for the odd one or two areas where a random area of vertices around the knee felt like shooting off to the left index finger when it was moved but other than that it wasn't an overly difficult task!!
Main trouble spots for the skinning part of the process was probably the shoulder area of the character, I have tried to get them as best as I can but still there not perfect and time is running short so I can't really dedicate more time to getting them perfect but good enough for this animation anyway.
One of my main concerns was if there was going to be any side effects from this process between the morpher modifier and the skin modifier i.e. when using the morpher modifier would the face distort or would it just not move and be rigid to the biped'd head. Luckily, there has been no side effects between the two modifiers and I didn't have to weigh the vertices in the neck or head section as they are already weighted as I wanted them to be which is brilliant!!
Also what helps with this is the fact that both my characters are pretty much identical, so I can quite simply save the completed file of the skinned character and keep him as a template so then I can merge the template with my scene for filming whenever I require both characters in the shot which helps save time!!
Below is an image showing that the character is skinned to a reasonably satisfactory
standard, but i don't particularly wish to play around with him anymore in this process.

Monday, 3 May 2010
The way of the Morpher... (A bloody life of its own!)
After some time spent looking at possibilities of facial features I was ready to start making better versions of the facial features by cloning new models from the original and then working from scratch using the older tests as a rough template to improve on.
Everything was going as planned, I finished one of my morph targets off and tested it this is what happened:
Not cool! To say the least, because only one half of it's body was affected I assumed from the beginning that it had something to do with the symmetry modifier.
How to over come this?
I continued to test the limits I could go to before the distortion of the mesh happened again but it would have been pointless to continue with this model as the limits I could go to were extremely limited, it was happening mostly whenever I moved the vertices around where they would link with the projected half of the model (I didnt move them outwards of course, just upwards or downwards to narrow the mouth or open the mouth as this would mess up the symmetry alignment).
I tried to collapse the models modifiers and create an editable mesh with which then I could add my morpher. This was a waste of time and a setback because
1) I would have had to have re-cloned all morph targets as editable meshes.
2) Even if I did re-clone all the meshes it would have taken a hell of a long time to create the facial features considering I had a hell of a lot more vertices to deal with because I couldn't toggle the editable poly modifier to go and tweak the low poly model to see how it comes out with turbosmooth switched on.
I had to re-think the situation, I tried to overcome this by creating what I called the "Morph Factory". To try and explain it simply, because it can get a bit wordy I created another save file from which I could make morph targets which were not collapsed, because in the factory the "Queen" wasn't collapsed, so I could clone from her morph targets, adjust them how I wanted them and then I cloned that morph target and then I would save the file then open my main file. From my main file of collapsed models I then went to File-Merge, picked the named model I wished to use as the models morph target and bring it into the scene and SUCCESS!! It worked.... But.. I ended up finding out a much easier solution which was more time efficient and was an extremely simple solution.
Final Solution
I went back to my save file from where Morph factory came from with the un-collapsed models and removed the symmetry modifier, as a test I then made a morph target and added a morpher to my main model, this worked fine as usual, so then I added a symmetry modifier on top of the morpher and tested the morpher out and SUCCESS!!!
It bloody worked and I was so relieved, such a simple solution and I went so far out of my way to try something complicated, so my end modifier list was:
symmetry
morpher
turbosmooth
editable poly
Although what is strange, is originally I tried to add a morpher and place it this way round, but the distortion thing still happened but I didnt try to delete the symmetry modifier originally, which is why I ended up going the long way round.
So one thing I have found out is, if you are getting this problem, delete symmetry and morpher if you have it in your modifier list put in morpher first then on top of morpher add the symmetry modifier.
But what you need to do is ensure that all you have in your modifier list is editable poly with (optional but this is what I had) turbosmooth, then copy your model as normal and create the morph target, you can add a symmetry modifier to your morph target to make it easier to see how the model looks, but once you have edited it delete the symmetry modifier and continue that process. Once you have all your morph targets (make sure none of them have symmetry modifiers, all of them should only have turbosmooth and editable poly)with your main model who will be animated, add the morpher modifier, add objects as normal (I think you can add them in later but I didnt risk it) then once you have done that then add the symmetry modifier.
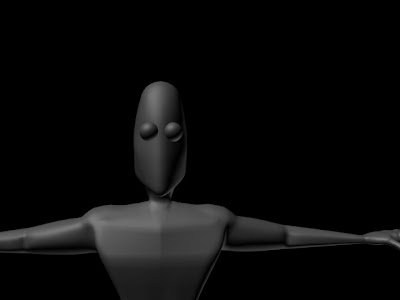
The following is a render of the scene to show you how my scene looked before I added a morpher and symmetry modifier to my main characters:
NOTE All models do not have the symmetry modifier put on them until the very last point when all morpher targets are complete even after the morpher target has been added to the morpher list for the animated characters, they still do not have a symmetry modifier attached, only the characters who will be animated do.
Animations
The following animations have been experimentations with some of the final morpher target faces.
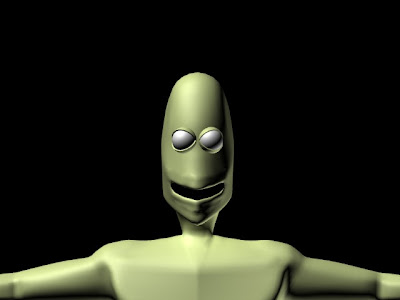
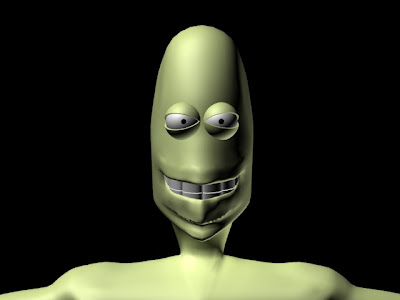
This one is a scared/shock/horrified sort of face:
SHOCK HORROR!
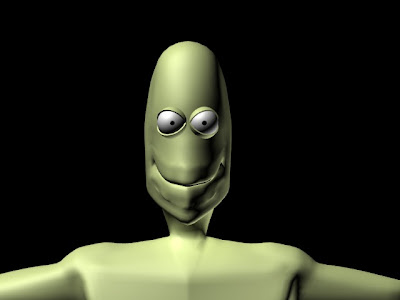
This was a trial test to see blinking with a facial feature and how often blinking should be animated in the final animation:
Blink and Smile :D
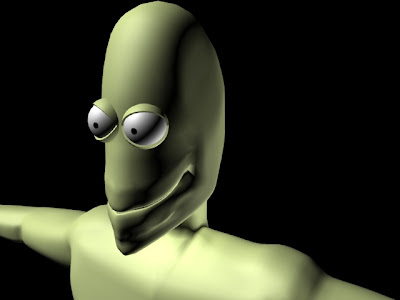
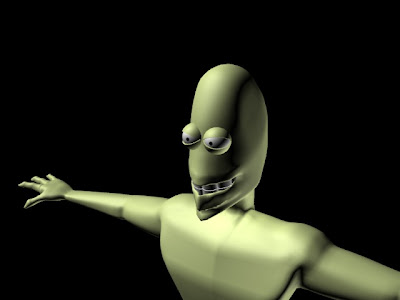
This video was testing out one of the grins these characters have with a sly sort of look:
Grin and bear it!
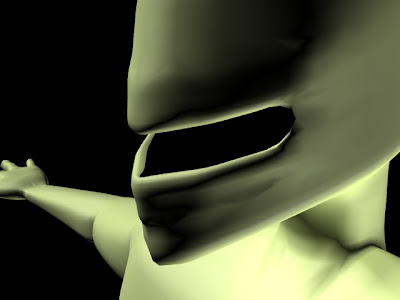
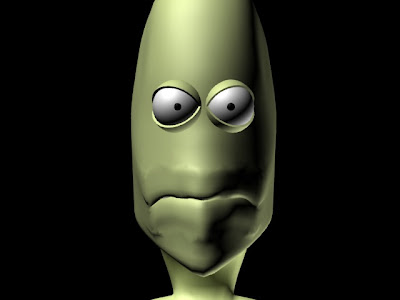
This test video is my current favourite, it's basically a slight alteration from the sly grin one above but looking pretty evil. With this one I fooled about with lighting to create a menacing atmosphere.
I used an omni light and placed it above the character to cast the shadows down his face and I placed a spotlight to the right side of his face to illuminate particular features of his face, mainly to illuminate his teeth because they weren't being fully exposed, it also adds to the madness!!!
Sinister Grin
For the final test video, I wanted to see if it would be possible to animate my characters mouth to be articulate enough for full speech. I used the "Jolly Tosh Old Chap" sound clip to try this and it came out with an interesting result and not as bad as I was expecting.
Although I would love to take it further and create full speech within this animation I think it would be too time consuming, I will animate them with facial features and voices but more with grunts and groans, although for my personal projects I will take this further and more than likely use these characters also:
Lip Sync test
I know, he's blinking far too much!! This is something I have noted for my animation, how frequent the blinks should occur and for what facial emotions I personally think blinking should occur more often for (but I am still happy with the frame rate of the blinks).
From experimenting with my characters with different facial poses and aspects on how to overcome the animation i have learned the strengths, weaknesses and limitations of my "Actors" and what the best way to use them is to get the most out of them for my animation. These experiments in my opinion have been extremely productive and beneficial into delving deeper into understanding 3DS MAX and how to overcome these obstacles in future projects, which I will be doing plenty of!!
Everything was going as planned, I finished one of my morph targets off and tested it this is what happened:

Not cool! To say the least, because only one half of it's body was affected I assumed from the beginning that it had something to do with the symmetry modifier.
How to over come this?
I continued to test the limits I could go to before the distortion of the mesh happened again but it would have been pointless to continue with this model as the limits I could go to were extremely limited, it was happening mostly whenever I moved the vertices around where they would link with the projected half of the model (I didnt move them outwards of course, just upwards or downwards to narrow the mouth or open the mouth as this would mess up the symmetry alignment).
I tried to collapse the models modifiers and create an editable mesh with which then I could add my morpher. This was a waste of time and a setback because
1) I would have had to have re-cloned all morph targets as editable meshes.
2) Even if I did re-clone all the meshes it would have taken a hell of a long time to create the facial features considering I had a hell of a lot more vertices to deal with because I couldn't toggle the editable poly modifier to go and tweak the low poly model to see how it comes out with turbosmooth switched on.
I had to re-think the situation, I tried to overcome this by creating what I called the "Morph Factory". To try and explain it simply, because it can get a bit wordy I created another save file from which I could make morph targets which were not collapsed, because in the factory the "Queen" wasn't collapsed, so I could clone from her morph targets, adjust them how I wanted them and then I cloned that morph target and then I would save the file then open my main file. From my main file of collapsed models I then went to File-Merge, picked the named model I wished to use as the models morph target and bring it into the scene and SUCCESS!! It worked.... But.. I ended up finding out a much easier solution which was more time efficient and was an extremely simple solution.
Final Solution
I went back to my save file from where Morph factory came from with the un-collapsed models and removed the symmetry modifier, as a test I then made a morph target and added a morpher to my main model, this worked fine as usual, so then I added a symmetry modifier on top of the morpher and tested the morpher out and SUCCESS!!!
It bloody worked and I was so relieved, such a simple solution and I went so far out of my way to try something complicated, so my end modifier list was:
symmetry
morpher
turbosmooth
editable poly
Although what is strange, is originally I tried to add a morpher and place it this way round, but the distortion thing still happened but I didnt try to delete the symmetry modifier originally, which is why I ended up going the long way round.
So one thing I have found out is, if you are getting this problem, delete symmetry and morpher if you have it in your modifier list put in morpher first then on top of morpher add the symmetry modifier.
But what you need to do is ensure that all you have in your modifier list is editable poly with (optional but this is what I had) turbosmooth, then copy your model as normal and create the morph target, you can add a symmetry modifier to your morph target to make it easier to see how the model looks, but once you have edited it delete the symmetry modifier and continue that process. Once you have all your morph targets (make sure none of them have symmetry modifiers, all of them should only have turbosmooth and editable poly)with your main model who will be animated, add the morpher modifier, add objects as normal (I think you can add them in later but I didnt risk it) then once you have done that then add the symmetry modifier.
The following is a render of the scene to show you how my scene looked before I added a morpher and symmetry modifier to my main characters:

NOTE All models do not have the symmetry modifier put on them until the very last point when all morpher targets are complete even after the morpher target has been added to the morpher list for the animated characters, they still do not have a symmetry modifier attached, only the characters who will be animated do.
Animations
The following animations have been experimentations with some of the final morpher target faces.
This one is a scared/shock/horrified sort of face:
SHOCK HORROR!
This was a trial test to see blinking with a facial feature and how often blinking should be animated in the final animation:
Blink and Smile :D
This video was testing out one of the grins these characters have with a sly sort of look:
Grin and bear it!
This test video is my current favourite, it's basically a slight alteration from the sly grin one above but looking pretty evil. With this one I fooled about with lighting to create a menacing atmosphere.

I used an omni light and placed it above the character to cast the shadows down his face and I placed a spotlight to the right side of his face to illuminate particular features of his face, mainly to illuminate his teeth because they weren't being fully exposed, it also adds to the madness!!!
Sinister Grin
For the final test video, I wanted to see if it would be possible to animate my characters mouth to be articulate enough for full speech. I used the "Jolly Tosh Old Chap" sound clip to try this and it came out with an interesting result and not as bad as I was expecting.
Although I would love to take it further and create full speech within this animation I think it would be too time consuming, I will animate them with facial features and voices but more with grunts and groans, although for my personal projects I will take this further and more than likely use these characters also:
Lip Sync test
I know, he's blinking far too much!! This is something I have noted for my animation, how frequent the blinks should occur and for what facial emotions I personally think blinking should occur more often for (but I am still happy with the frame rate of the blinks).
From experimenting with my characters with different facial poses and aspects on how to overcome the animation i have learned the strengths, weaknesses and limitations of my "Actors" and what the best way to use them is to get the most out of them for my animation. These experiments in my opinion have been extremely productive and beneficial into delving deeper into understanding 3DS MAX and how to overcome these obstacles in future projects, which I will be doing plenty of!!
Mouth Making
To create the mouth, I selected the particular polygons I wanted to remove and deleted them, I then adjusted the positioning of the mouth using the vertices:

I wasn't happy with the way the mouth looked at this point, I wanted more of a curve where lips would be at this point the mouth looked too primitive:
I selected the top row of vertices on the upper and lower lip of the character and folded them in slightly and then curved the vertices that followed to make a basic lip shape:

From this I then experimented with altering the mouth shape, to see how the character would look in the end, I did this just by grabbing vertices and moving them to where i wanted them:
With a different perspective:
NOTE:This point of the build was done around the same time as when I was making the eyes, so some of these images show pupils and some don't, Like with the previous post one of the images had the mouth completed.
Once I could see what I had to work with I started to experiment with different facial features, this wasn't to go in the morpher, simply just for the renders to show my thought process and to also see how the model looks when the mesh is under particular stresses.
NOTE:These renders are testers and were not used for the final model, I had to re do these facial features for the morpher, this will be explained in the MORPHER post.
After a quite a while studying my model, I decided it would be wrong to not put teeth into the model. I built the teeth from a cylinder, I squashed in the cylinder then copied the model to however many i desired then rotated and scaled and adjusted the teeth set until it fitted into his mouth, I then copied the group to make two sets, upper and lower.
Heres the test renders with teeth, I did make a note and look into why the there was some sort of shadowy noise around his jaw line, I wasn't manipulating the mesh correctly, which has now been pretty much resolved.
Here's the images:

I wasn't happy with the way the mouth looked at this point, I wanted more of a curve where lips would be at this point the mouth looked too primitive:

I selected the top row of vertices on the upper and lower lip of the character and folded them in slightly and then curved the vertices that followed to make a basic lip shape:

From this I then experimented with altering the mouth shape, to see how the character would look in the end, I did this just by grabbing vertices and moving them to where i wanted them:

With a different perspective:
NOTE:This point of the build was done around the same time as when I was making the eyes, so some of these images show pupils and some don't, Like with the previous post one of the images had the mouth completed.

Once I could see what I had to work with I started to experiment with different facial features, this wasn't to go in the morpher, simply just for the renders to show my thought process and to also see how the model looks when the mesh is under particular stresses.
NOTE:These renders are testers and were not used for the final model, I had to re do these facial features for the morpher, this will be explained in the MORPHER post.


After a quite a while studying my model, I decided it would be wrong to not put teeth into the model. I built the teeth from a cylinder, I squashed in the cylinder then copied the model to however many i desired then rotated and scaled and adjusted the teeth set until it fitted into his mouth, I then copied the group to make two sets, upper and lower.
Heres the test renders with teeth, I did make a note and look into why the there was some sort of shadowy noise around his jaw line, I wasn't manipulating the mesh correctly, which has now been pretty much resolved.
Here's the images:


Eyes
The eyes were very simple to create, I will show how in the following stages.
1.
The actual eyeball
The actual eyeball of the characters was quite simply a sphere resized to the size I wanted and copied over to the other side (make sure symmetry modifier is on, may make things a little bit easier!!)
2.
Eyelids
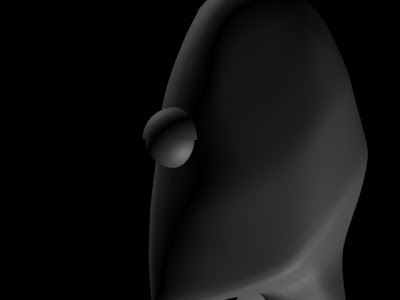
To make the eyelids, I copied one of the eyeballs, without moving it from it's copied position I scaled a fraction larger than the size of the sphere it was cloned from (eyeball).
Using the hemisphere tool, I retyped into the attributes 0.5, this gives you half a sphere, for all areas of the eyes I did not convert any to editable poly seen as it isn't necessary.
I then copied these "semi-spheres" and using the rotate tool, rotated the copied eyelid 180 degrees, as shown with the images below:

Images showing eyeball with both eyelids, originally all of this was done with one eye then all copied to the other side of the face, to ensure the eye proportions were the same

By looking at how the eyelids open and close to reveal the eye underneath, I wasn't happy with them opening as normal (with eyelids facing forward so to speak). Because of the shape of the characters head, I selected the eyelids and rotated them outward slightly to get the satisfactory look and also because he's "humanoid" it doesn't look strange only adds to the alien like look, more images below:
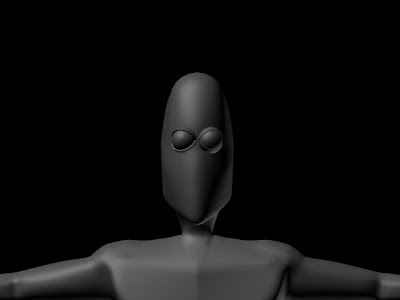
In order to rotate the eyelids, I quite simply used the rotate tool, but make sure in the drop down menu on taskbar you set it to LOCAL and not VIEW to ensure the eyelid properly rotates as desired.
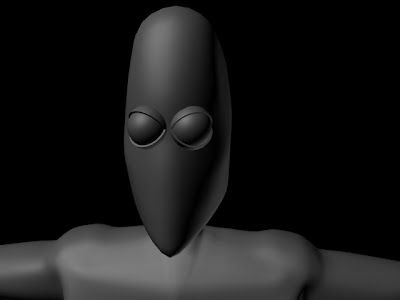
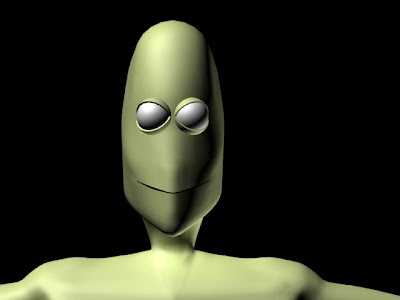
Looking at the model I realised he didn't have pupils!! I quite simply, cloned the eyeball again and resized the pupil and copied it and placed it into the other eye and added colour to the main eyeball and pupil. This image shows his mouth, this will be covered in the next post. I then selected and linked the pupils to the eyeball, so when the eyeball rotates the pupil goes with the eyeball.
Animation
This animation was just a quick test to see how long in the timeline I should give myself for blinking and to also see what would be the best method of moving the eyes realistically and economically.
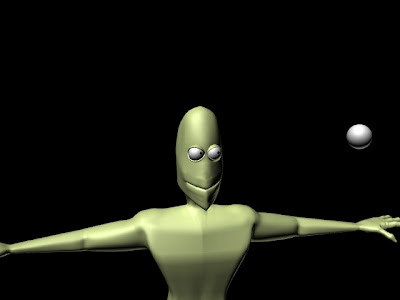
For the eyeballs animation I used the look at constraint. The "look-at" was another clone of the eyeball, I positioned it slightly outward to make sure he wouldn't go crosseyed to start with!!
When I first linked the eyeball to the lookat constraint he went immediately cross eyed!!
I found that because I previously rotated the eye as well as the eyelids the look at constraint snapped the eyeball back to it's original position. This was quite a simple problem to overcome, I quite simply removed the lookatconstraint, then broke the links between the pupils and eyeballs and then added in the lookat constraint again, to let the eyeball snap into place and then I re - selected and linked the pupils now the eyes are corrected and rotate fine.
NOTE: From using this method I had a re - think and thought that perhaps it would be more of a wise idea to clone both eyeballs together and make the left eyeball look at the left constraint and the right eyeball look at the right constraint, this would also help with making more dynamic eye movement!
i will have to render out an animation to show this experiment.
For the eyelids, I used the method that I mentioned earlier, using the local rotation. I found the best amount of time to animate a blink at 30fps is a span of 4 frames from original position e.g. frame 1 = fully open frame 3 = fully closed and frame 5= back to fully open. I was happy with the timing of the blink animations and if you can't be bothered to re animate them over and over again, you can quite simply copy and paste the particular keyframe desired to where you want it on the timeline considering the eyelid isnt't a dynamic object, it's only going to open and close at differing degrees and speeds (but remember, there are four eyelids to animate!!).
The following is the animation, I apologise for the quality, I did render this out in 800 x 600 but I may have to try a higher render output in future!
1.
The actual eyeball

The actual eyeball of the characters was quite simply a sphere resized to the size I wanted and copied over to the other side (make sure symmetry modifier is on, may make things a little bit easier!!)
2.
Eyelids

To make the eyelids, I copied one of the eyeballs, without moving it from it's copied position I scaled a fraction larger than the size of the sphere it was cloned from (eyeball).
Using the hemisphere tool, I retyped into the attributes 0.5, this gives you half a sphere, for all areas of the eyes I did not convert any to editable poly seen as it isn't necessary.
I then copied these "semi-spheres" and using the rotate tool, rotated the copied eyelid 180 degrees, as shown with the images below:

Images showing eyeball with both eyelids, originally all of this was done with one eye then all copied to the other side of the face, to ensure the eye proportions were the same

By looking at how the eyelids open and close to reveal the eye underneath, I wasn't happy with them opening as normal (with eyelids facing forward so to speak). Because of the shape of the characters head, I selected the eyelids and rotated them outward slightly to get the satisfactory look and also because he's "humanoid" it doesn't look strange only adds to the alien like look, more images below:

In order to rotate the eyelids, I quite simply used the rotate tool, but make sure in the drop down menu on taskbar you set it to LOCAL and not VIEW to ensure the eyelid properly rotates as desired.

Looking at the model I realised he didn't have pupils!! I quite simply, cloned the eyeball again and resized the pupil and copied it and placed it into the other eye and added colour to the main eyeball and pupil. This image shows his mouth, this will be covered in the next post. I then selected and linked the pupils to the eyeball, so when the eyeball rotates the pupil goes with the eyeball.

Animation
This animation was just a quick test to see how long in the timeline I should give myself for blinking and to also see what would be the best method of moving the eyes realistically and economically.
For the eyeballs animation I used the look at constraint. The "look-at" was another clone of the eyeball, I positioned it slightly outward to make sure he wouldn't go crosseyed to start with!!
When I first linked the eyeball to the lookat constraint he went immediately cross eyed!!
I found that because I previously rotated the eye as well as the eyelids the look at constraint snapped the eyeball back to it's original position. This was quite a simple problem to overcome, I quite simply removed the lookatconstraint, then broke the links between the pupils and eyeballs and then added in the lookat constraint again, to let the eyeball snap into place and then I re - selected and linked the pupils now the eyes are corrected and rotate fine.

NOTE: From using this method I had a re - think and thought that perhaps it would be more of a wise idea to clone both eyeballs together and make the left eyeball look at the left constraint and the right eyeball look at the right constraint, this would also help with making more dynamic eye movement!
i will have to render out an animation to show this experiment.
For the eyelids, I used the method that I mentioned earlier, using the local rotation. I found the best amount of time to animate a blink at 30fps is a span of 4 frames from original position e.g. frame 1 = fully open frame 3 = fully closed and frame 5= back to fully open. I was happy with the timing of the blink animations and if you can't be bothered to re animate them over and over again, you can quite simply copy and paste the particular keyframe desired to where you want it on the timeline considering the eyelid isnt't a dynamic object, it's only going to open and close at differing degrees and speeds (but remember, there are four eyelids to animate!!).
The following is the animation, I apologise for the quality, I did render this out in 800 x 600 but I may have to try a higher render output in future!
Subscribe to:
Posts (Atom)
